
Indoor Cyanotypes
A quick, fun, safe and beautiful introduction to photographic processes for a rainy day

Introduction
I mentioned in my Home Darkroom article that cyanotype work could be done in a merely dim room. As I wrote that, it occurred to me that it had been a long time since I’d done any cyanotypes myself, and that it was about time I rectified the situation!
This article shows how I made a cyanotype contact print without a darkroom or developing chemicals, on a rainy day in England in April with no sunshine. I’ll go into the equipment, the process of how to find out the exposure times, and how to get that beautiful Prussian Blue in a hurry if you’re impatient! There’ll be a discussion of other things you can do with cyanotypes, and some other processes that follow a similar path.
This is photographic printing at its simplest. Though, as ever, there is always another level of complexity to explore if you get the bug!
Background
The most common way to make cyanotype prints is to use sunshine as a source of the ultraviolet light that you need. Unfortunately, where I live, sunshine is a scarce resource. You can do it when it’s cloudy, but results will be less consistent. Doing it in the rain is a challenge I really didn’t want to deal with!
As luck would have it, tucked away in the loft, was a box containing a UV nail lamp that I’ve owned for over 15 years, and which I bought with the express intention of using for cyanotypes, but (until this month) never had. It has survived a house move, and the creation of three real human beings since then. It was time to put it to work.
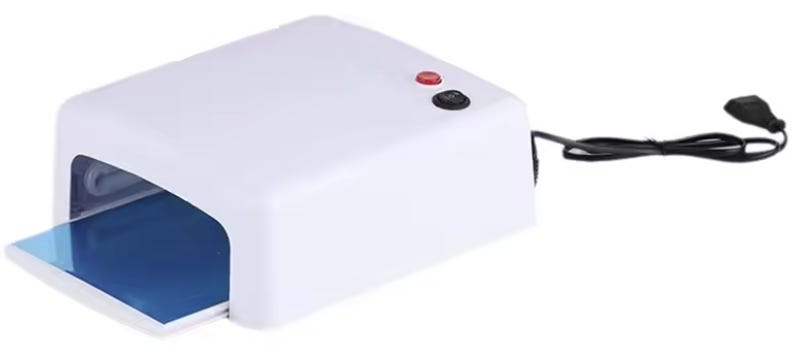
[image of a similar box from AliExpress… though mine has a UK plug on it]
I had originally intended to buy some cyanotype chemicals and to coat my own paper... but I’d never actually got around to doing that, so I needed to buy some pre-coated sheets. These are readily-available in many shapes and sizes from various places at various prices and associated quality points. I got mine from cyanotype.co.uk this time, but I have also bought kits from Little Vintage Photography in the past, which were truly excellent.
[image from my Instagram post in 2019, if you can believe it… Little Vintage Photography cyanotype kit]
Testing
So, I had some paper, which had been pre-coated with UV-sensitive cyanotype formula, and dried. I had a source of Ultra-Violet light. How would I figure out how long it needed under the lamp to give the deepest blue colour?
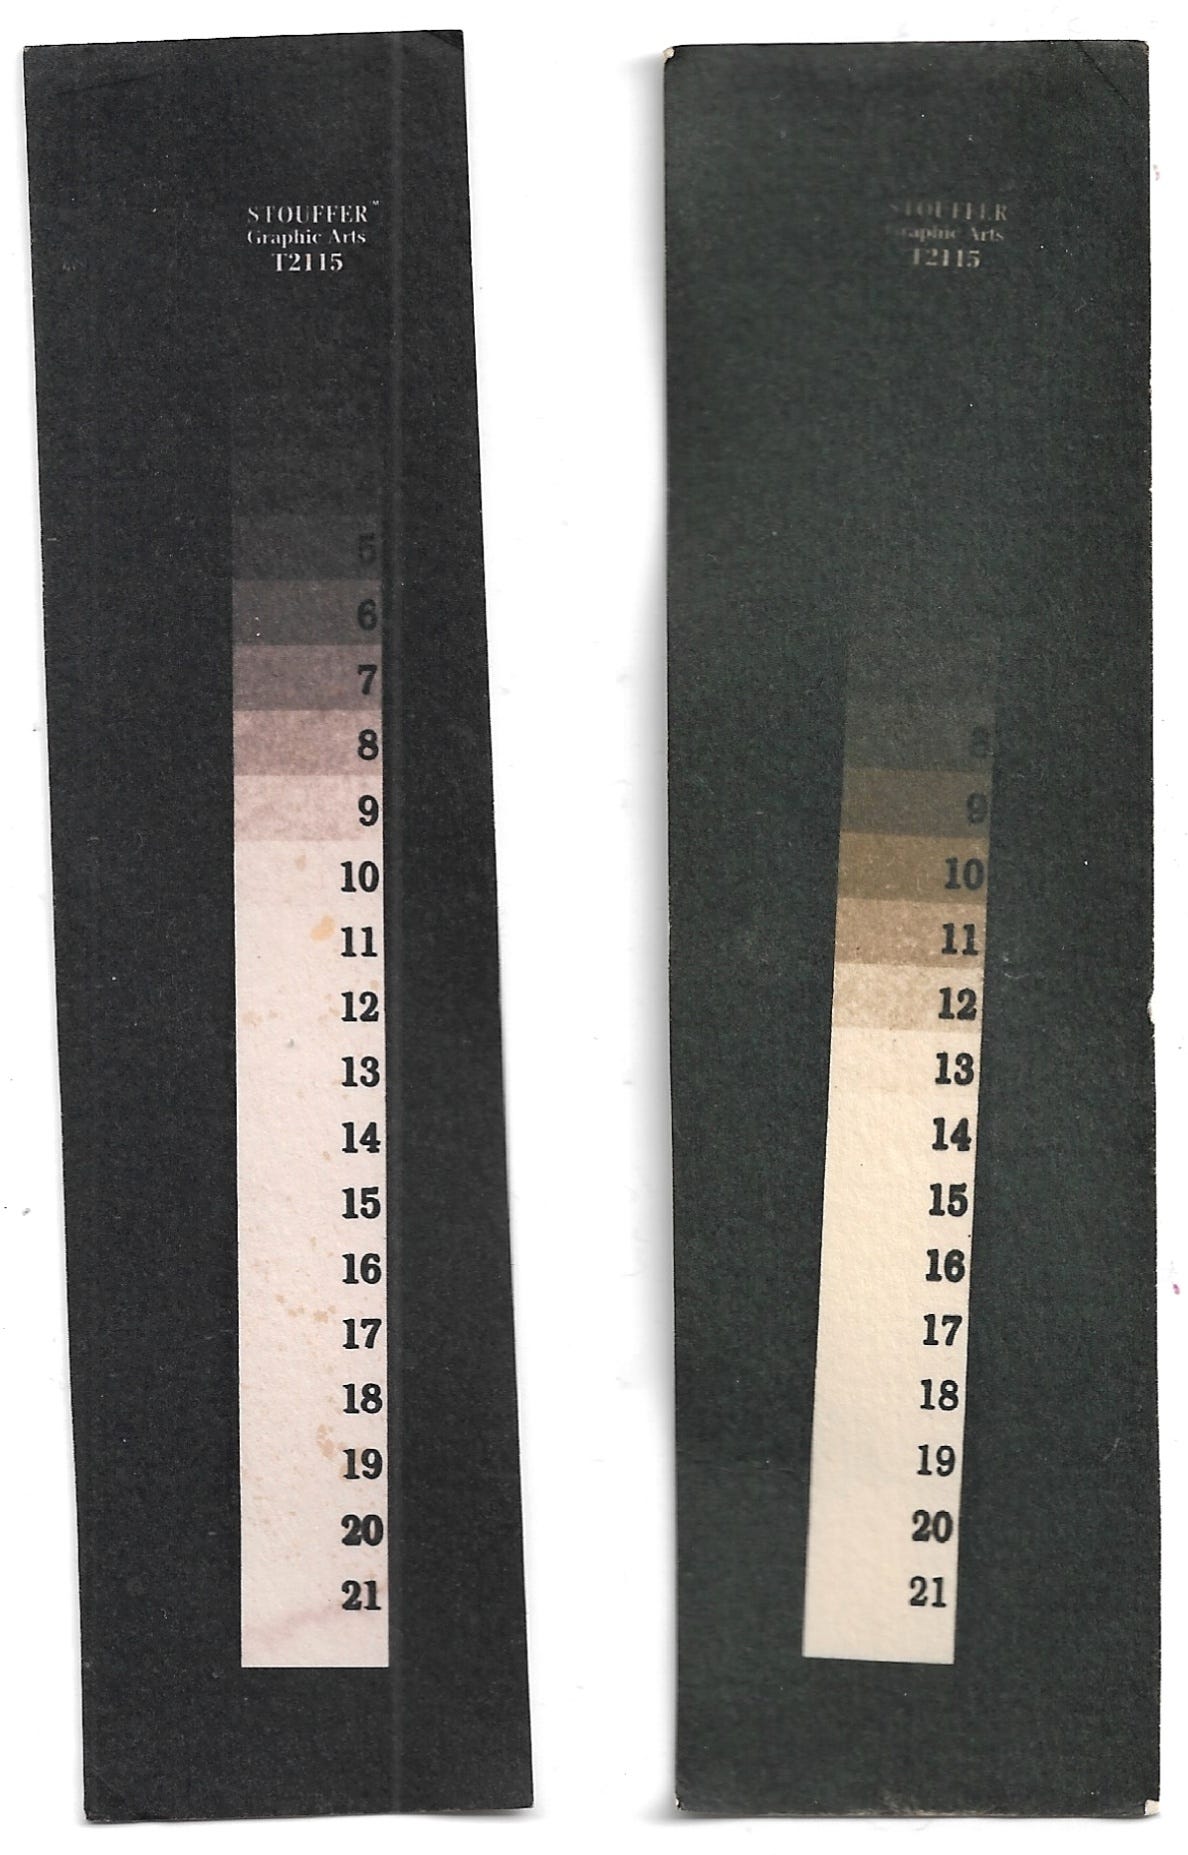
One indispensable piece of photography paraphernalia that I can’t live without is a Stouffer Step Wedge.
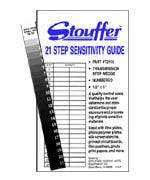
[image from Stouffer.net]
In simple terms, it is a thin piece of plastic with patches of neutral-density filters that show a steady progression from totally clear to totally black. Each square lets through half a stop less light than the last. By overexposing your paper through the wedge, you can easily calculate the best exposure time for your process. I use mine all the time when I’m trying to figure out a new process or recalibrate my methods for a change in materials.
I used an old picture frame (left over from an exhibition I was exhibiting in - prints still available!) with standard framing glass in it to hold the step wedge flat against the paper for the duration of the exposure. If the wedge had moved, or lifted off the paper, it would have been very difficult to interpret the results. However, I know that some glass blocks a significant amount of UV, and may affect my results. Regardless, provided I carried on using the same piece of glass, the results would still be valid.
The first challenge was finding a spot to place the UV lamp. To make the picture frame fit, I had to slide out the removable base from the lamp... but this meant that UV light would be flooding the area beneath the lamp for however long the exposure took. I briefly considered just putting it on the carpet, but then imagined leaving a bleached patch the shape and size of the lamp that I’d have to try to explain later! In the end, I used an upturned wooden chess board as a base.
The lamp I have is extremely simple. It has a single switch with 3 positions (Timed, Off, On) and a button to start the timed exposure. I propped the reflective base up over the opening so it wouldn’t shine in my eyes, but was also careful not to look into the light. It’s rated as safe for human eyesight, but why take the chance?
My first exposure was for 10 minutes (see results section), but there was a shadow cast over part of the paper for some of the time, so I made a second exposure for 30 minutes and was more careful with positioning.
Development
One of the nice things about cyanotypes is that they can be “developed” or “revealed” using simply cold tap water (I’ve heard cold is best). This washes away the unexposed chemistry and converts the grey/green exposed parts to a glorious blue that is very difficult to adequately scan and show on screen, but that looks remarkable in person.
[image from my Instagram post in 2019 ]
I use a small photography tray, but any container big enough for your paper will work. I wouldn’t recommend using kitchenware if you’re intending to use it for food again later on, but if you have an old tray or tub you can donate to photography, then anything water-tight will work.
Wash it around for a minute or so until the colour stops changing. You’ll likely see blue, but it won’t be as intense as it could be, yet. Usually, that takes time as the paper dries and the chemicals fully oxidise. There is, however, a trick you can use to speed it up.
A small splash of Hydrogen Peroxide in the wash bath will instantly turn your pale blue masterpiece to vivid Prussian Blue before your eyes. At the end of the day, the blue is the same as it would have been, but you got to see it sooner, which is fun :)
Obviously, take precautions if you’re using Hydrogen Peroxide. This stuff is hair bleach and will also happily bleach clothes, carpets and your skin. Careful.
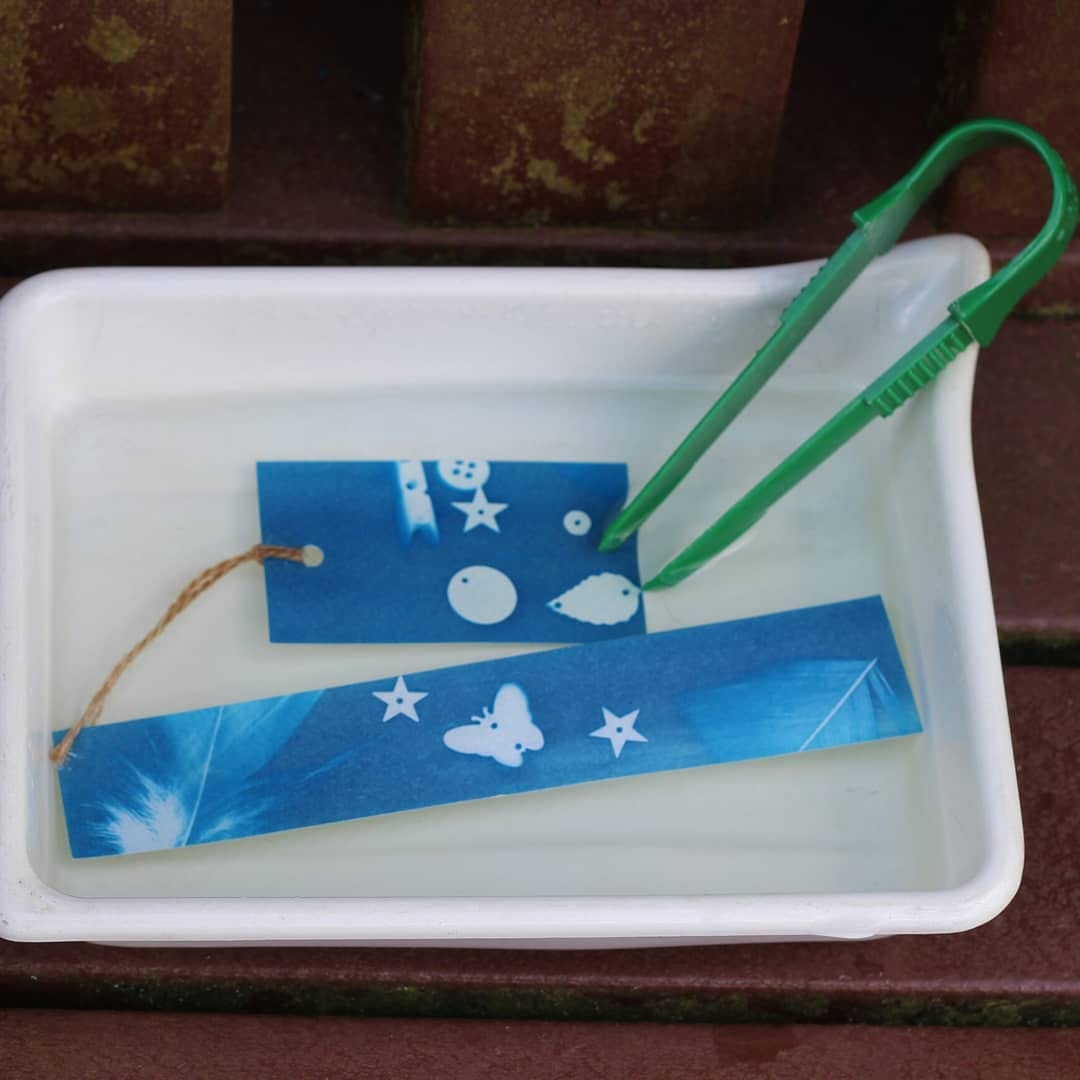
Test strip results
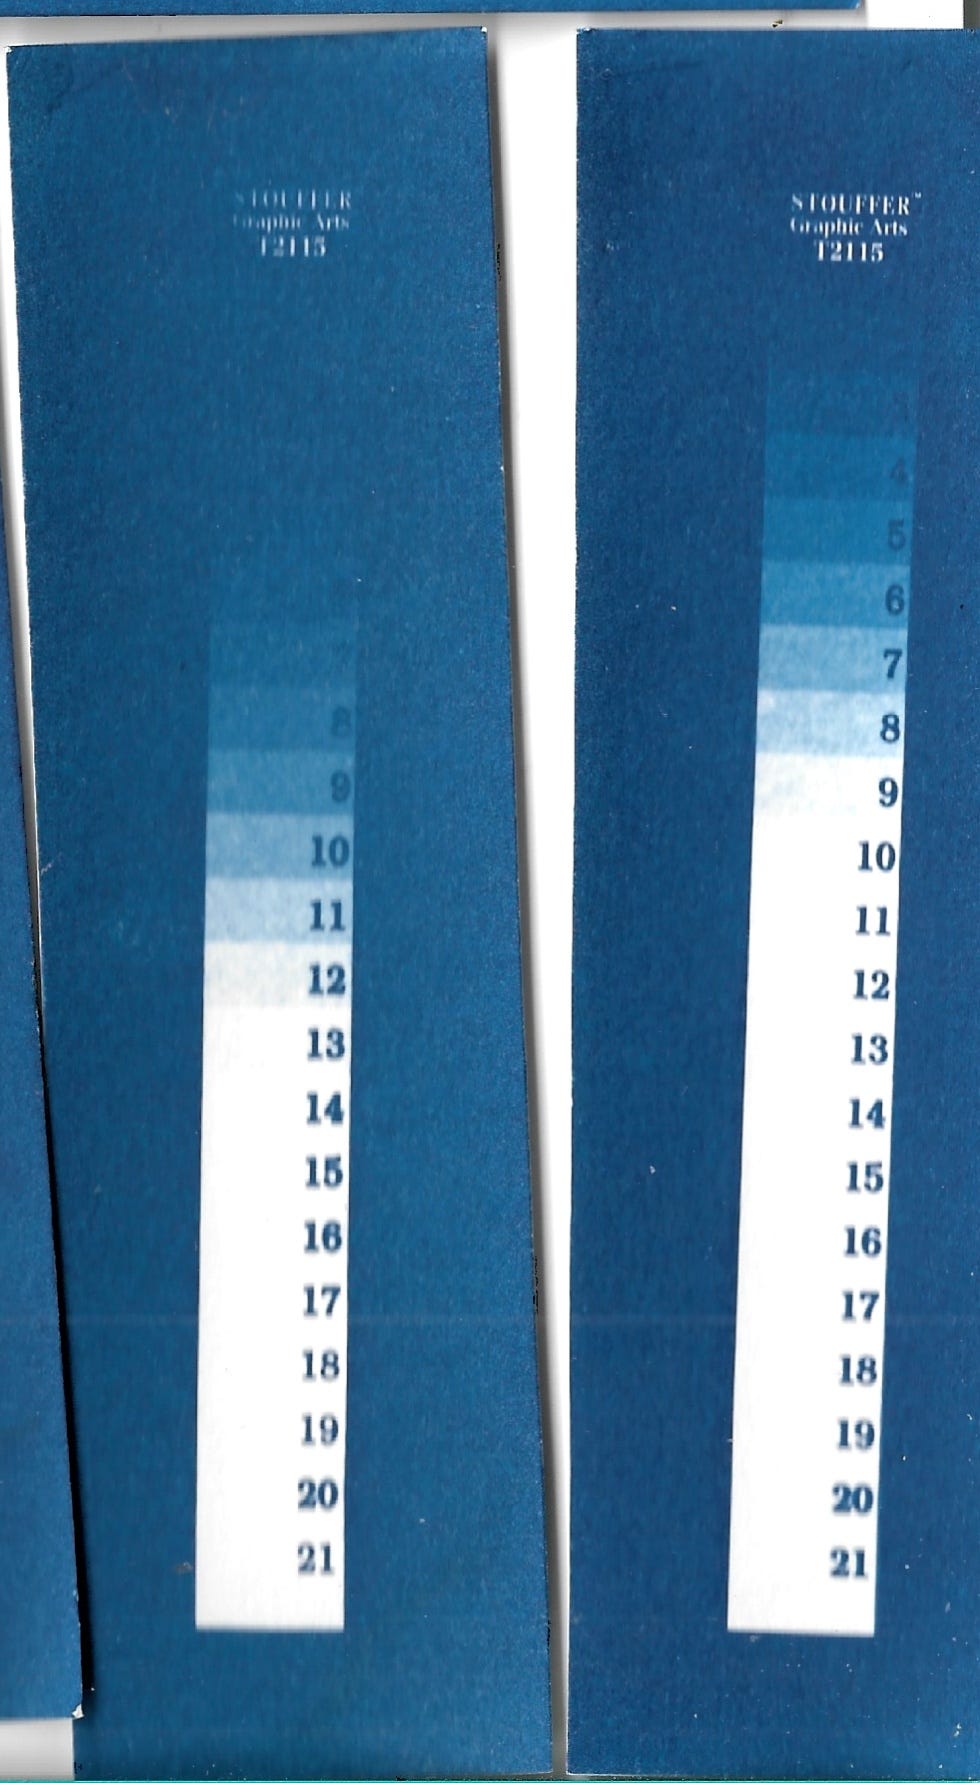
[test strips - confusingly misarranged so the first one is on the right hand side!]
As you can see, the first strip (RHS, 10 mins) shows maximum blue only around step 0 or 1, but it’s inconclusive because that was also the part that was partially shaded during the exposure.
The second test strip (30 mins) shows maximum blue from around step 4 (these strips are much easier to see IRL than on scans, by the way). 4 steps is equal to 4x half-stops, or 2 full stops, so the minimum time for maximum blue is approximately:
30 minutes / (2 x 2) = 7.5 minutes
I rounded up to 8 minutes for a safety margin :)
Negative test
With the baseline set for 8 minutes to give maximum blue through the glass, with no obstructions, it was time to test with a BW negative.
I dug into my files and pulled out this shot from 2020 when I was involved in Project Box Camera
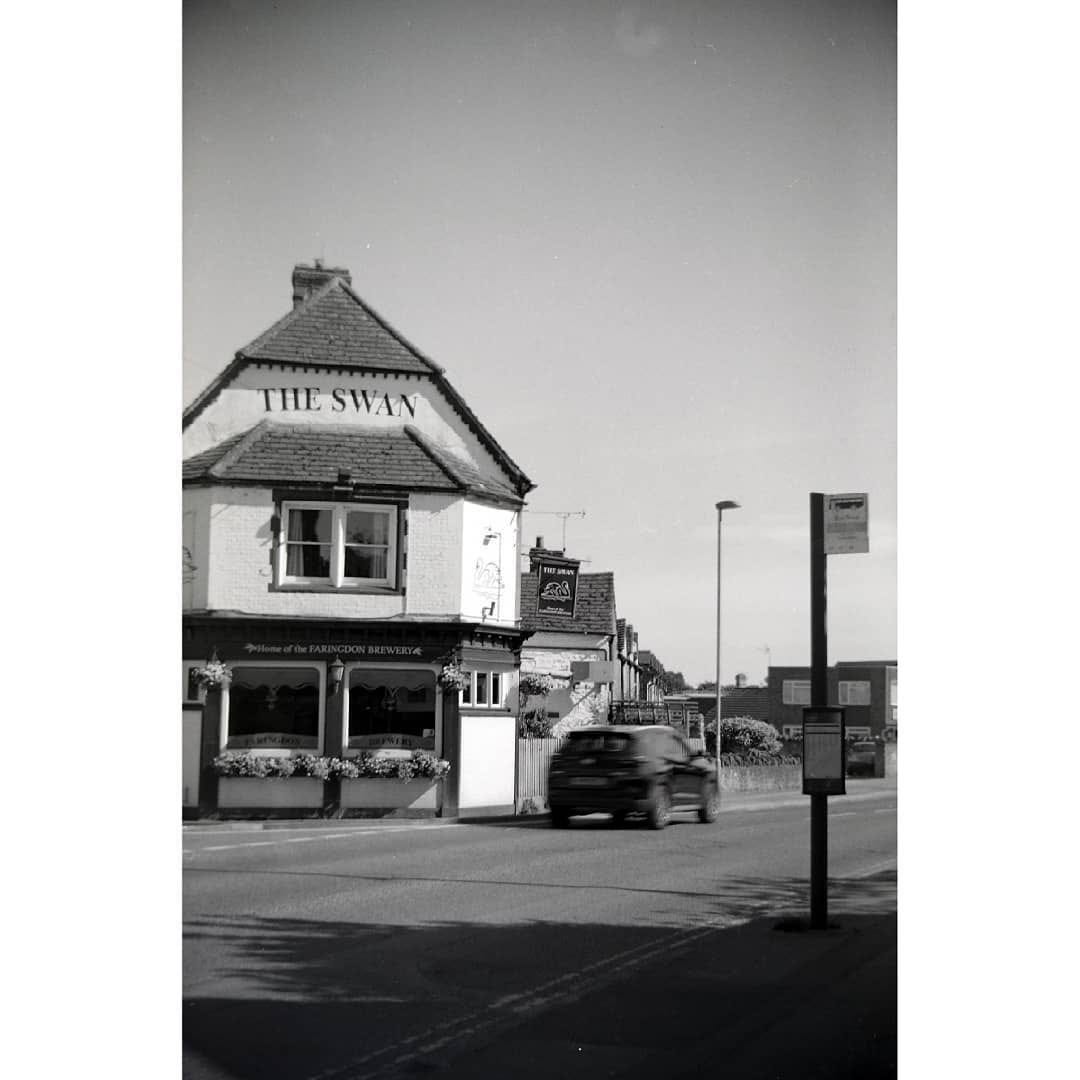
[Ilford HP5+ 120, Coronet Rex Flash, R09 1+50]
This was back during the dark COVID times, and any sort of distraction was very welcome. We were in lockdown at that time and I had to take our cat to the vet (but wasn’t allowed in with her), so I was able to visit a nearby town and spool through a roll of film. They came out very nicely, but were not especially precious to me, so they were ideal for a cyanotype contact print.
Here’s the result:
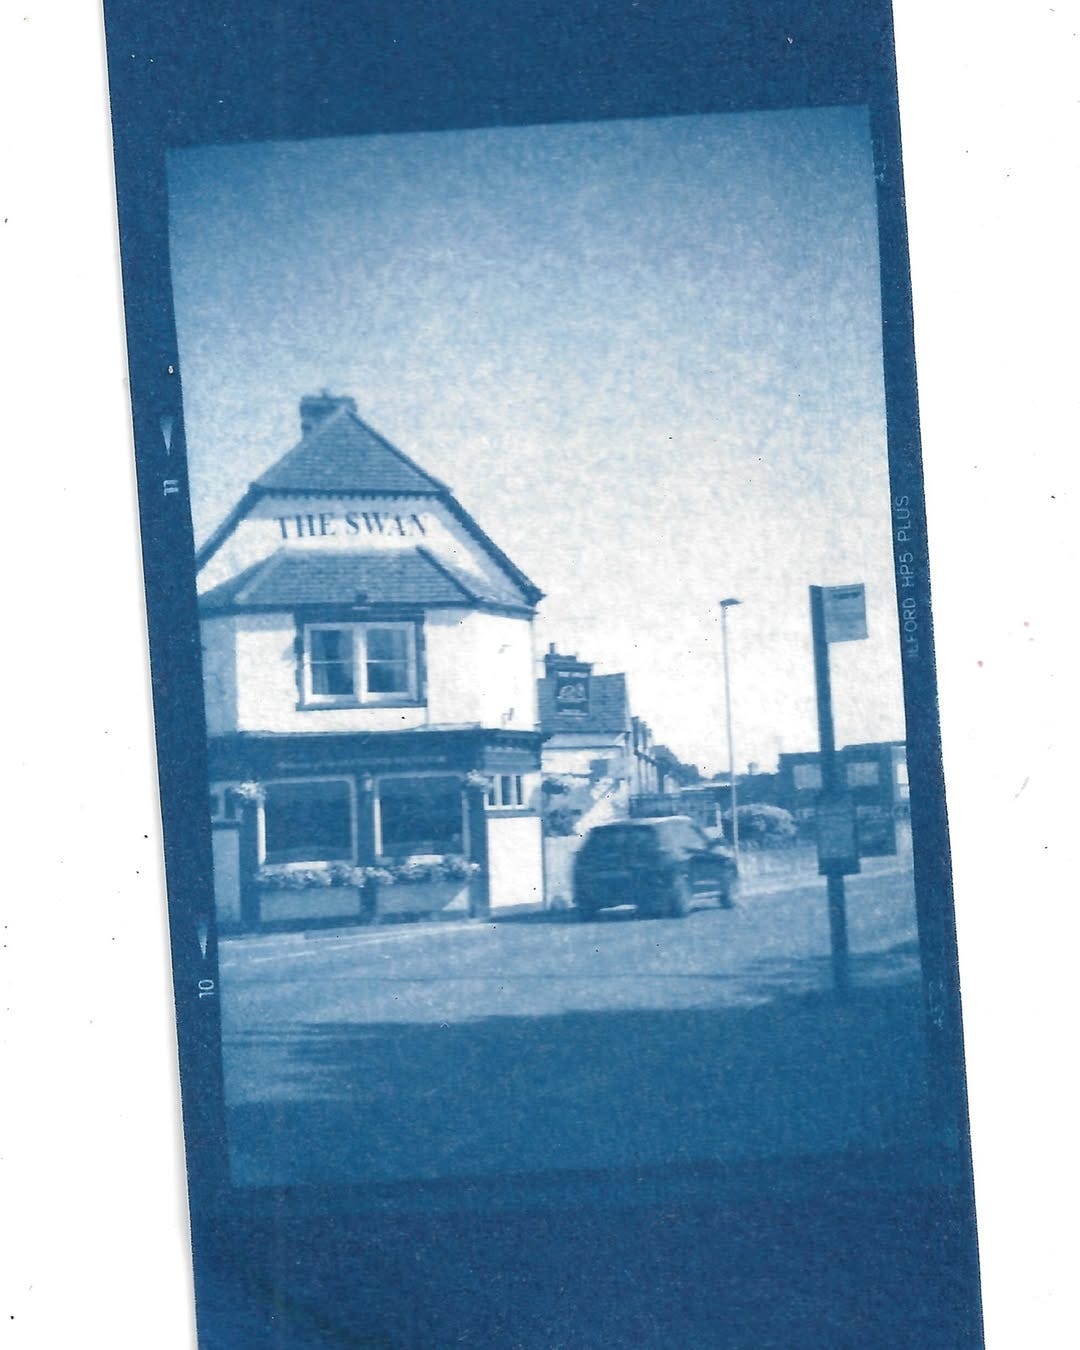
What do you think?
There’s a bit of shadowing/blurring, which is partly down to the paper texture, but is probably mostly down to having UV lamps along the sides as well as above the image. I expect that if I lifted the lamp above the paper, rather than having the lamps surrounding the paper, I’d likely get a better result (though I’d have to recalibrate with test strips to figure out the exposure time again).
Photograms
I had the bug by now, and wanted to try some other things. Cyanotypes have often been used to make photograms of plants and flowers, most notably in the 1850s by Anna Atkins.
There are lots of beautiful bluebells in our garden at the moment, so I borrowed one that had spawned rather further into the lawn than usual and I trapped it between the glass and the cyanotype paper to make a photogram. Here’s the result at 8 minutes:

[Bluebells 8 mins]
It’s nice, but there’s no detail at all in the flowers, so I intended to do another one at 16 minutes... but forgot about it and gave it 27 by mistake :)
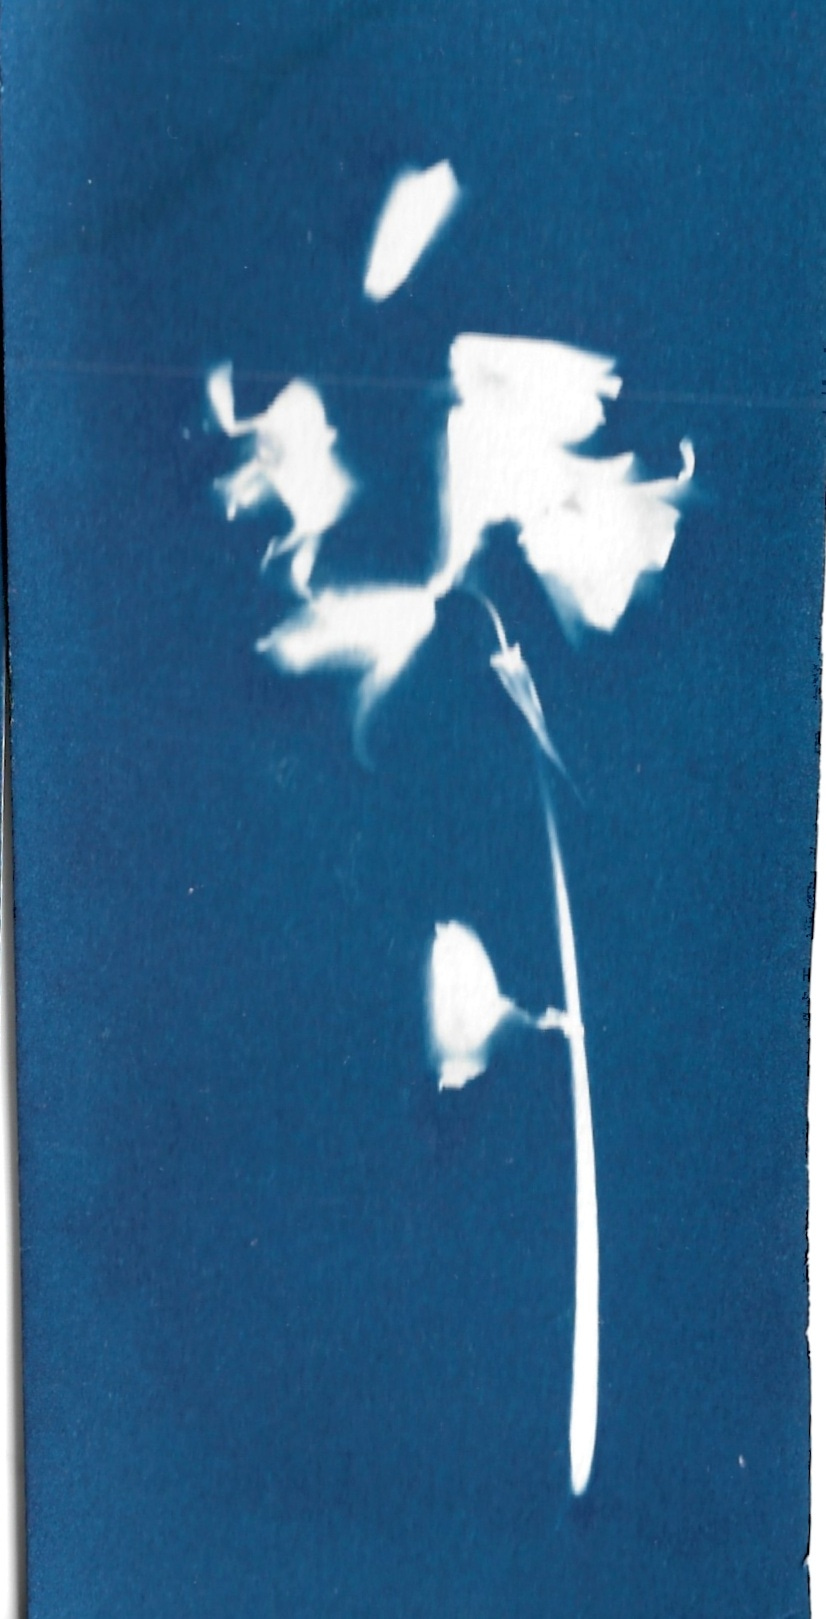
[Bluebells 27 mins]
There’s a bit more detail in the petals, but you lose some of the stem - again, possibly partly because of the wrap-around lighting, which is not ideal. Oh, and the flowers were the other way up this time!
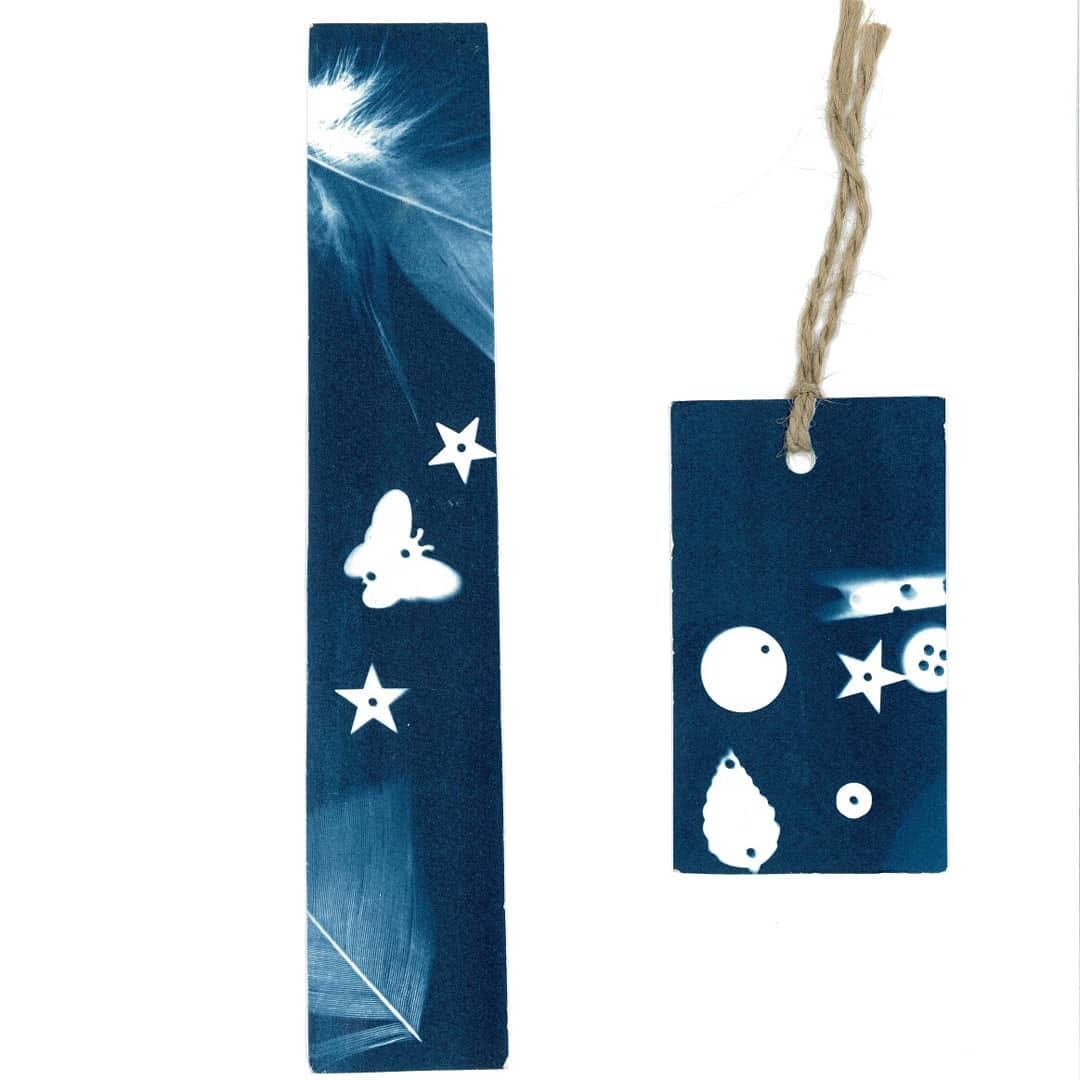
One benefit of using a UV lamp is that you can also make images in the evening. Here’s one I tried using random things I found around the house. What can you identify? (8 minutes again, missed the edge...)
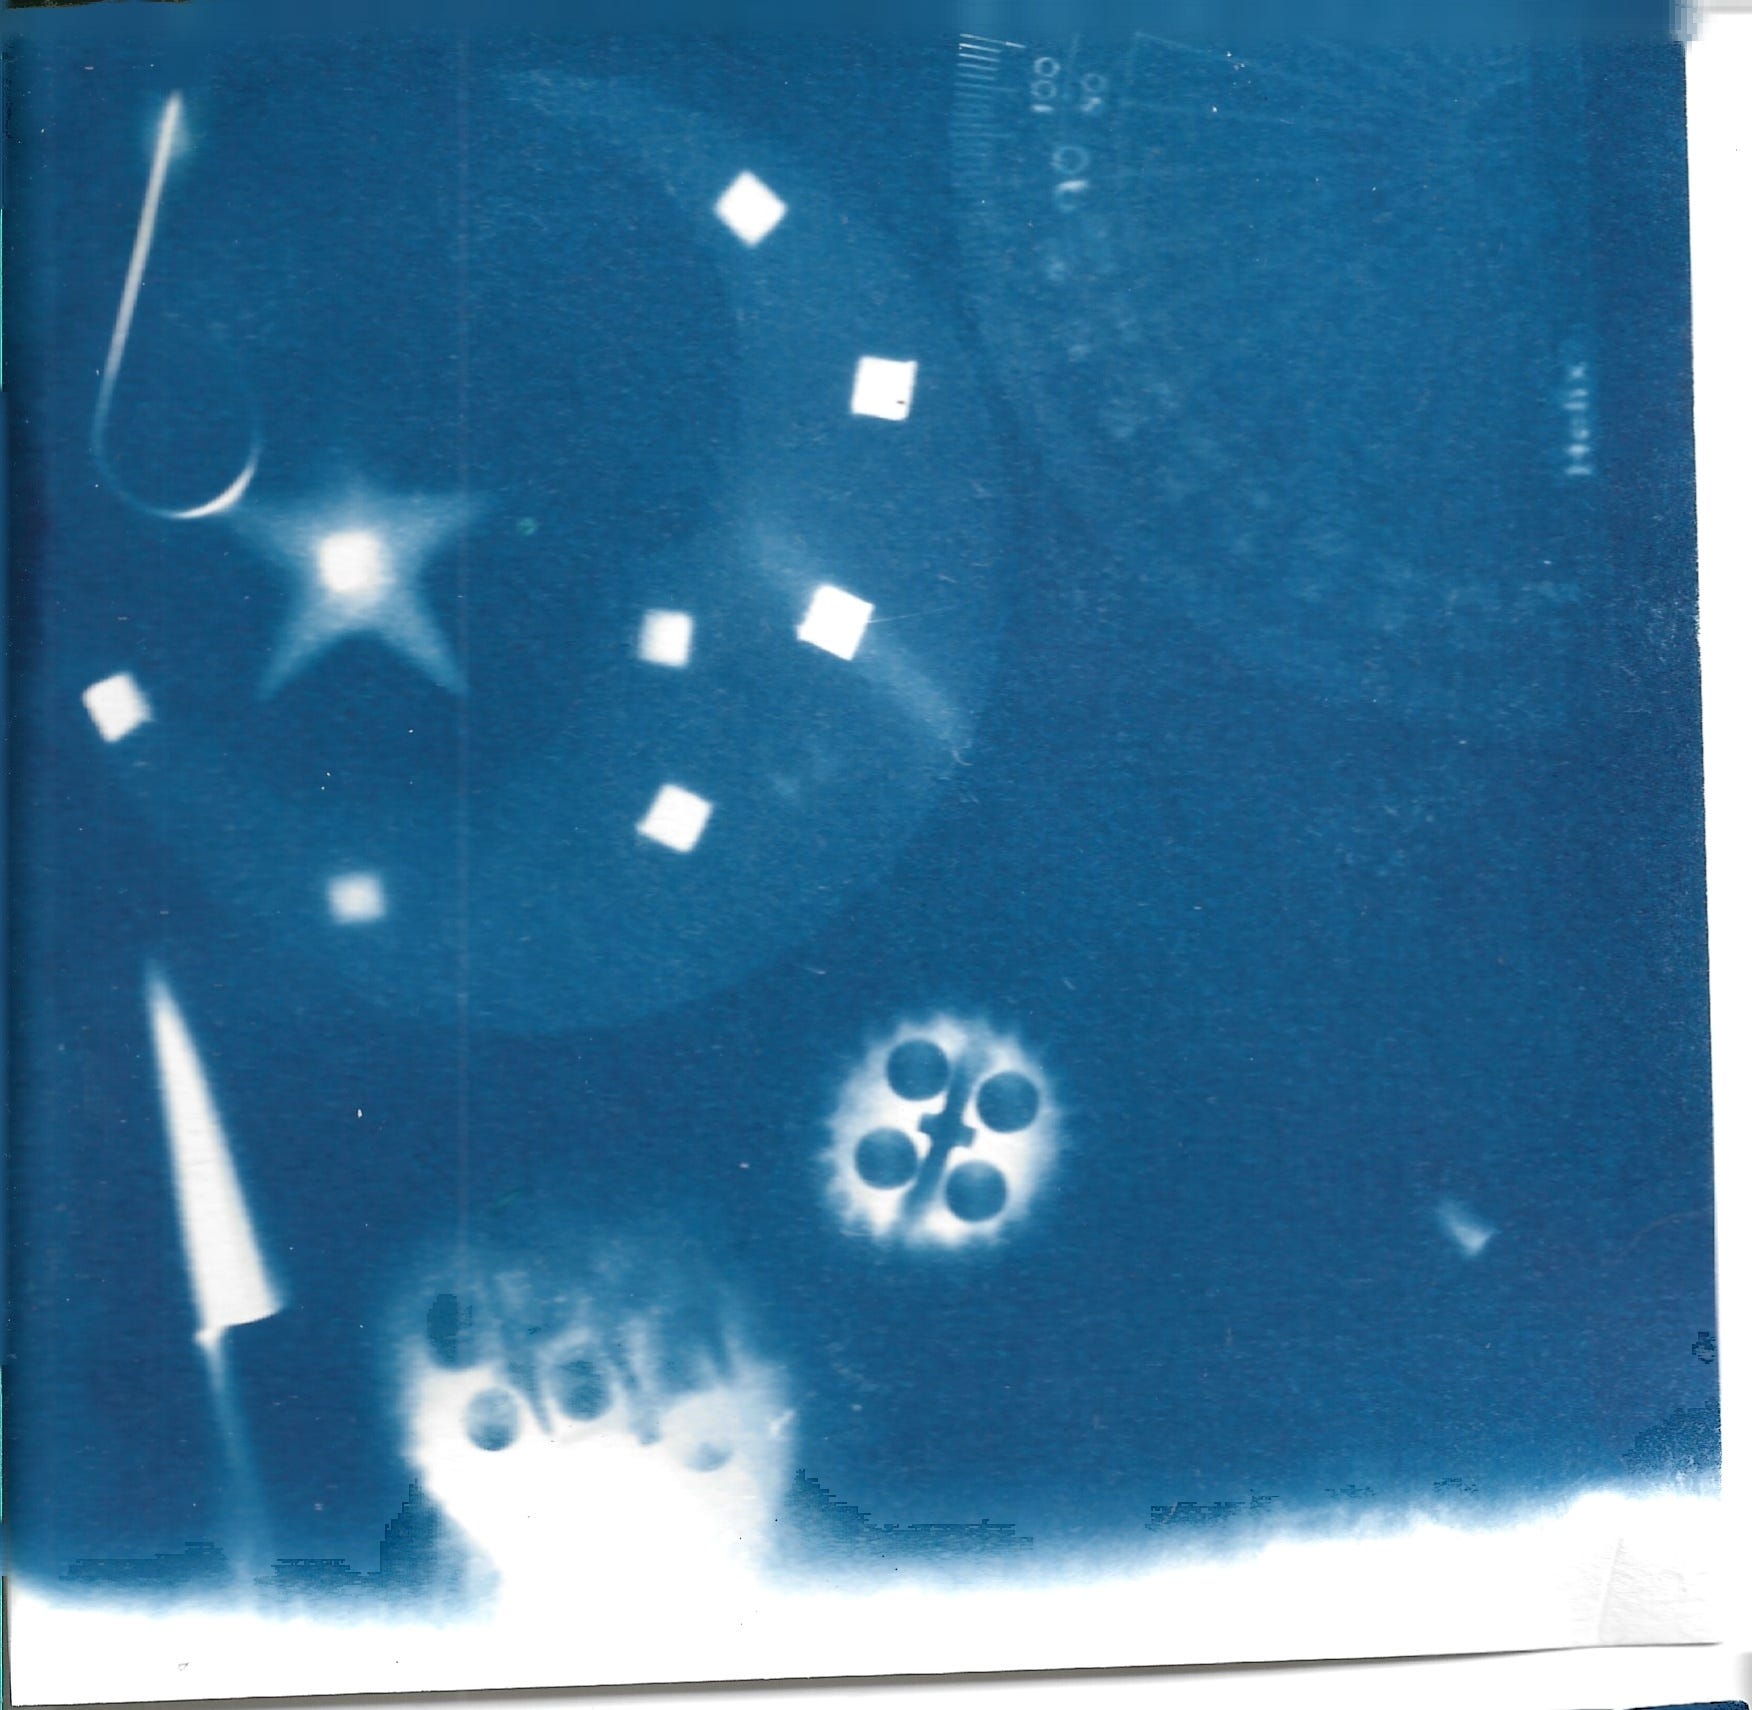
[Photogram of odds and ends]
Toning
Beautiful, though the Prussian Blue cyanotypes are; sometimes blue isn’t what you want. There are some options here. It is possible to change the colour of a cyanotype to a range of reds, browns, greens, purples or greys by “toning” the print. You can bleach the blue from the print first, which results in a lighter-toned image, or tone it without the bleach.
I had heard that more or less anything with tannins can be used to tone cyanotypes, but that you need to watch out for accidentally just staining the paper! Wine, coffee, tea, and various vegetable peelings and plants can all be used. I thought I’d give it a go with some tea, on the test strips.
The first (10 minute) strip used pure Green tea, and the second (30 minute) strip used Rooibos tea. Each was made with a single teabag in 400ml of boiling water and allowed to cool completely before use. The strips were left in the cold tea for around an hour and a half, agitating occasionally.
The Rooibos strip has shifted to green while, counterintuitively, the Green tea strip has shifted to a kind of aubergine purple.
There is a little staining from some hard water scum on the green tea, but I do like that colour palette, so I'll likely try that again (maybe with a filtration step)
Lamp options
If you’re interested in using a lamp for cyanotypes, there are lots of options and they don’t have to be expensive. I already explained the nail curing box with UV fluorescent tubes, but there are also more modern LED versions, or dedicated image-making lamps along with angle-poise options for photopolymer work, various resin curing varieties and even UV LED strips if you fancy making your own!
Some things to look out for in the specifications include:
Wavelength (365nm is optimal, but 385nm is common too, and works OK)
LED or tube (LEDs more common now, but the wavelengths may vary)
Size (of lamp and illuminated area)
Directionality (to avoid shadowing, a point-source is ideal)
Power/Heat (LEDs produce less heat than tubes)
Power supply (is it matched to your country’s mains electricity?)
Cost (prices can vary wildly!)
Safety (ensure eye protection and/or a shield to protect your eyes in use - especially for lower-cost options from the far East!)
Convenience (can it be packed away quickly and easily, for example? What’s the setup time?)
But also... don’t forget the sunshine, if you happen to live in a country that regularly sees the fiery ball in the sky. That has to be the lowest-cost option!
Taking it further
Pre-coated paper too easy for you? Why not buy a kit and coat it yourself?
Buying premixed chemicals too easy for you? Why not buy the ingredients and mix them yourself?
Doing it by yourself too boring? Why not try a workshop?
Pre-made paper too easy for you? Why not make your own paper?
Actually, on paper, the type of paper makes a huge difference to the end results. Check out Christina Z Anderson and her enormous body of work around testing cyanotypes across different paper types, formulae and toning. Astonishing.
Being a comparatively slow medium, cyanotypes can be used for projects where a faster medium would struggle. For example, I’ve seen people pinning up a wall of cyanotype paper in the shade of a tree and capturing the dark and light patches as the sun shines through the branches. The results can be beautiful.
I’ve also seen people coating fabric and laying out on it in the sunshine to leave a full-body cyanotype photogram on the cloth!
The possibilities are endless.
Other UV processes
Cyanotypes are, of course, a gateway drug to other alternative photography processes. A couple of very similar processes are Van Dyke Brown
[image from Wikipedia]
and the somewhat lower-cost (and food-safe) Turmeric process!
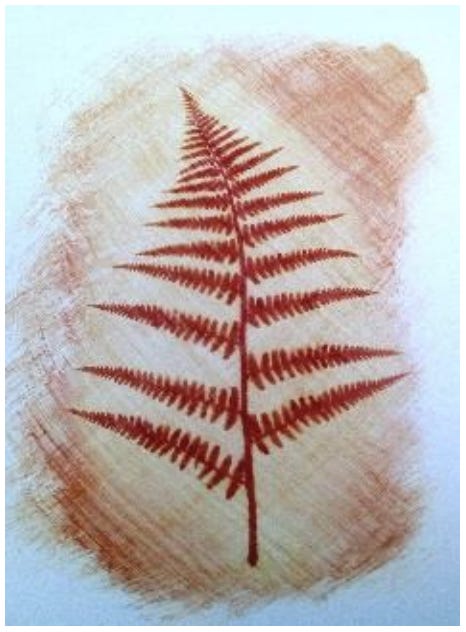
[image from Justin Quinnell]
The latter is an example of an “Anthotype” process, of which there are many to choose from/discover.
With your fancy UV lamp, you may also find yourself getting into photopolymers and screen/block printing... but that’s a topic for another day :)
Postscript
Have you tried Cyanotypes? How did you get on? Have I persuaded anybody to give it a go for the first time?? Leave a comment below!
This SubStack will always be free. If you like what I’m doing and want to help stop my bank account draining so quickly, then a paid subscription is only £4 per month (or £40 per year) and materially helps me to buy the things I need to do these experiments and keep writing articles. There’s no pressure, of course! You’re all very welcome, whether you’re a free or a paid subscriber. If you have already bought a subscription, then THANK YOU! It really helps :o)